If you are trying to turn a concept into a testable, functional part fast, a cnc custom machining prototype is often the most direct route to real-world validation—before you commit to tooling or scale production.
Why a CNC Custom Machining Prototype Beats “Pretty” Prototypes
A cnc custom machining prototype is built from production-grade materials and manufactured with controlled tolerances, so it behaves like the final part, not just a visual mockup. That matters when your design must withstand heat, load, vibration, pressure, or repeated assembly cycles. Compared to purely cosmetic models, a cnc custom machining prototype helps you validate fit, function, and manufacturability in one step.
In the serious world of CNC machining, here are some commonly used machining-related terms you must know.:
- precision machining, tolerance stack-up, GD&T, DFM (design for manufacturability)
- inspection reports, material certs, surface finishing
- low-volume production, engineering change iterations

Rapid Prototyping with CNC—Speed Without Guesswork
When teams say they need speed, they usually mean fewer iterations. A cnc custom machining prototype supports rapid prototyping because you can modify CAD, adjust critical features, and rerun parts quickly—often without changing the process flow. In practice, rapid prototyping becomes a loop: design → machine → test → refine → repeat.
To make rapid prototyping truly fast, your supplier should:
- review the drawing for risk features (thin walls, deep pockets, sharp internal corners)
- suggest DFM changes that preserve function while improving machinability
- confirm inspection strategy for critical dimensions early
A cnc custom machining prototype is most valuable when the feedback loop is engineered—not improvised.
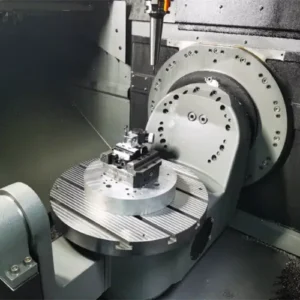
CNC Milling vs. CNC Turning for Prototype Geometry
A cnc custom machining prototype can be produced through CNC milling, CNC turning, or a combination of both.
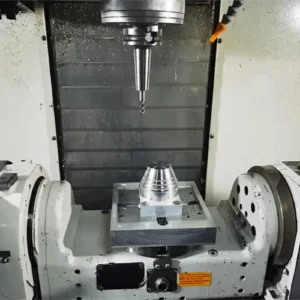
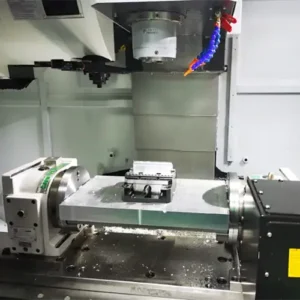
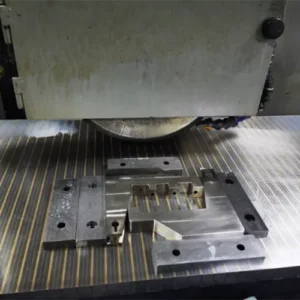
CNC milling for prismatic parts and complex features
CNC milling is ideal for housings, brackets, heat sinks, manifolds, plates, and multi-face parts. If your cnc custom machining prototype needs pockets, slots, contours, or 3D surfaces, CNC milling is typically the primary process.
CNC turning for round parts and concentric features
CNC turning excels for shafts, bushings, sleeves, collars, and components with rotational symmetry. For a cnc custom machining prototype where concentricity and runout matter, CNC turning provides stable control and efficient cycle times.
In many real projects, the best cnc custom machining prototype uses CNC turning for the core shape and CNC milling for flats, holes, and keyways.
Material Strategy for a CNC Custom Machining Prototype
Material choice determines performance, machinability, and test relevance. For many engineering teams, aluminum machining is the default for early validation because it is lightweight, machinable, and widely available. But the “right” cnc custom machining prototype material is the one that matches your risk.
Common prototype materials:
- aluminum machining (6061/7075) for structural parts and lightweight assemblies
- stainless steel for corrosion resistance and higher strength
- brass/copper for conductivity and sealing interfaces
- engineering plastics (POM, PA, PEEK) for wear, insulation, and low friction
If you need comparable performance, pick the production material early; if you need learning fast, prototype in aluminum machining first, then migrate.

Tolerance, Inspection, and What “Precision” Really Means
A cnc custom machining prototype only helps if the critical dimensions are measured and controlled. Your drawing’s tolerance scheme should reflect function, not habit. Over-tight tolerance increases cost and lead time without improving performance.
Practical tolerance planning
- Set tight tolerance only on functional interfaces (seals, bearing seats, alignment datums)
- Use GD&T to define intent (position, flatness, perpendicularity) rather than “magic numbers”
- Specify surface roughness where it impacts sealing, sliding, or fatigue
A reliable supplier will confirm how each cnc custom machining prototype dimension will be inspected—calipers, CMM, pin gauges—and whether you need a report.
Surface Finishing That Matches Real Use (Not Just Looks)
Prototype finishing should support testing. A cnc custom machining prototype may need the same surface treatment as production to validate friction, corrosion, or cosmetic requirements.
Common finishes:
- bead blasting for uniform matte surfaces
- anodizing for aluminum machining parts needing corrosion resistance
- passivation for stainless steel
- polishing for optical or consumer-facing surfaces
- chemical conversion coating for conductivity and paint adhesion
If your product will be anodized, test anodized prototypes. A cnc custom machining prototype that ignores finishing often creates false conclusions.
Cost Drivers You Can Control Without Sacrificing Function
The cost of a cnc custom machining prototype is typically driven by machining time, setups, material utilization, and inspection effort. You can usually reduce cost by adjusting design choices while maintaining performance.
High-impact cost optimizations:
- avoid very deep pockets and small internal corner radii (tool limits drive time)
- standardize hole sizes to common drills/taps
- reduce unnecessary tight tolerance callouts
- consider splitting a complex part into two simpler parts for early rapid prototyping
The goal is not “cheap parts,” but faster learning cycles. That is what a cnc custom machining prototype is for.

A Prototype Workflow That Prevents Iteration Debt
A cnc custom machining prototype project moves fastest when decisions are staged:
- Intent review: define what must be validated (fit, strength, thermal, assembly).
- DFM pass: supplier checks machinability; you approve changes.
- Process plan: confirm CNC milling/CNC turning approach and inspection points.
- Build + inspect: measure critical tolerance dimensions; document results.
- Test + iterate: feed results back into CAD; repeat with focused changes.
This workflow makes rapid prototyping measurable rather than chaotic, and each cnc custom machining prototype becomes a controlled experiment.
Common Questions Before Ordering a CNC Custom Machining Prototype
“How many parts should I prototype?”
Start with the minimum that validates risk: often 1–3 units for fit checks, then a small batch for testing. A cnc custom machining prototype batch can also serve as bridge stock for early demos.
“Should I machine plastic or metal first?”
If function depends on stiffness, heat, or threading, begin with metal. If your goal is assembly fit and ergonomic evaluation, plastics can be useful. Many teams start with aluminum machining and then branch out.
“Do I need a full inspection report?”
If interfaces are critical or you are validating tolerance stack-ups, yes. Otherwise, specify only key dimensions for inspection to keep rapid prototyping cycles short.
When Prototypes Become Low-Volume Production
A cnc custom machining prototype often evolves into low-volume production, especially for industrial devices, medical fixtures, automation components, or pilot runs. In that phase, you may tighten tolerance, standardize finishes, and lock process controls. The same CNC milling and CNC turning backbone still applies; the difference is documentation rigor and repeatability.
If you plan this transition early, your final cnc custom machining prototype iteration can be “production-intent,” reducing time-to-market.
Conclusion: Build Smarter, Validate Faster, Then Scale
CNC custom-machined prototypes are not just ordinary parts; they play a crucial role in helping you make important decisions. By combining the speed of rapid prototyping with carefully planned CNC milling and turning processes, you can shorten iteration cycles and obtain production-ready designs faster. If you need guidance on design for manufacturability (DFM), material selection, and the fastest path from CAD drawings to tested and approved hardware, contact Weldo Machining to learn more and receive a customized material and quote based on your prototype goals and drawing requirements.