In CNC machining, accuracy and tolerance are two core concepts that are both distinct and closely related. The following explanation details their definitions, differences, relationships, and practical applications to help you better understand the relationship and differences between tolerance and accuracy:
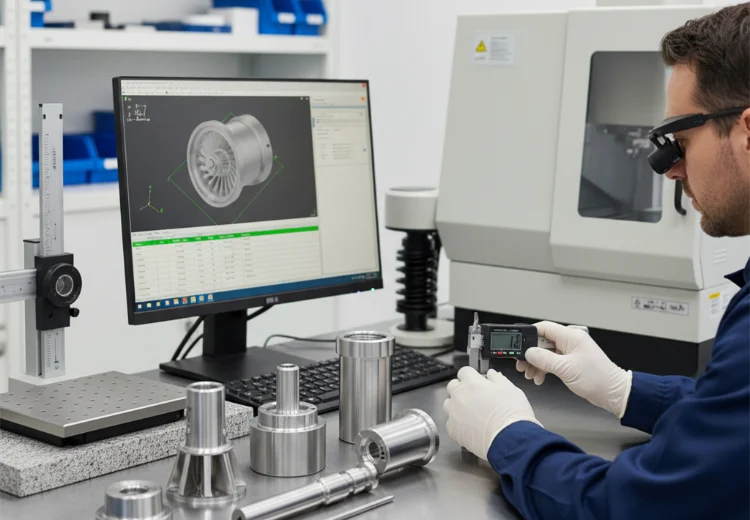
Definitions and Explanations
Accuracy
Core Meaning: Refers to the degree of closeness between the machined result and the design target value, reflecting “accuracy.”
Simple Understanding: Like shooting at a target, accuracy is the degree to which the bullet hits the bullseye. If multiple shots are concentrated near the bullseye, the accuracy is high; if they are scattered around the edges, the accuracy is low.
CNC Scenario: The degree of conformity between the dimensions, shape, position, and other parameters of the machined part and the design drawings.
Tolerance
Core Meaning: Refers to the allowable error range, that is, the maximum deviation limit between the actual value and the design value, reflecting “how much difference is allowed.”
Simple Understanding: Like a passing grade in an exam, a teacher allows the grade to fluctuate within ±5 points of the target score; this ±5 points is the tolerance.
CNC Scenario: The allowable deviation range of part dimensions and geometric tolerances (such as roundness and perpendicularity), usually specified by design drawings or industry standards.
Core differences
| Dimensions | Accuracy | Tolerances |
| Focus Points | The degree to which the actual value approaches the target value | Allowable error range (passing grade) |
| Measurement Methods | Absolute error (e.g., actual value – target value) | Upper and lower limits (e.g., ±0.05mm) |
| Determinants | Equipment precision, process control, and operational skill | Design requirements, functional requirements, cost balance |
| Goal Orientation | Striving for “the closer to the target, the better” | Striving for “within the acceptable range” |
Analogy Summary: Accuracy is the “shooting score,” while tolerance is the “passing grade.”
High accuracy (high score) does not necessarily mean low tolerance (strict passing grade), but low tolerance usually requires higher accuracy to guarantee it.
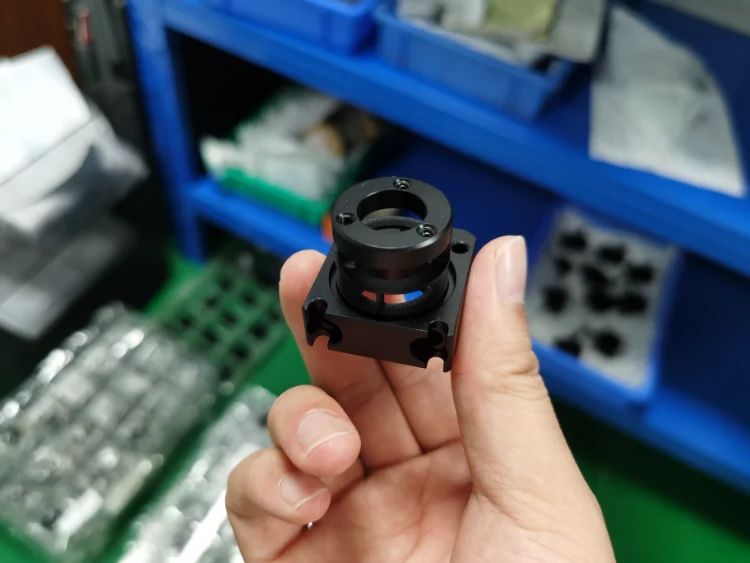
Relationships in CNC Machining
Tolerance is the “Constraint” for Accuracy
Tolerance sets upper and lower limits for accuracy. For example, if the design requires a shaft with a diameter of 50mm and a tolerance of ±0.02mm, the actual size must be between 49.98 and 50.02mm.
Accuracy must meet tolerance requirements: If the machining result is 49.97mm (exceeding the lower limit), even if the error is very small (only -0.03mm), it will still be judged as unqualified because it does not meet the tolerance.
Accuracy affects tolerance selection
High-precision equipment can support smaller tolerances: 5-axis CNC machine tools, due to their high precision, can machine parts with a tolerance of ±0.005mm; while ordinary 3-axis machine tools may only be able to achieve ±0.05mm.
Tolerance design must consider the cost of accuracy: Too small a tolerance may require higher precision equipment and stricter process control, leading to a surge in costs. For example, aerospace parts have stringent tolerances (±0.001mm), while consumer electronics parts can have tolerances as relaxed as ±0.1mm.
Dynamic Balance Between Accuracy and Tolerance
Function Priority: Critical parts (such as gear meshing surfaces) require high precision and small tolerances; non-critical parts (such as decorative grooves) can have more relaxed tolerances.
Economic Trade-off: While meeting functional requirements, balance accuracy and cost by optimizing processes (such as step-by-step machining and multiple inspections).
Practical Applications of CNC Machining
Case 1: Aero-engine Blade Machining
Tolerance Requirements: Blade profile tolerance ±0.01mm, surface roughness Ra0.4μm.
Accuracy Guarantee: Utilizing a 5-axis linkage high-speed milling center equipped with an online measurement system; Employing low-temperature machining processes to reduce thermal deformation; Improving surface quality through multiple finishing and polishing processes.
Result: Accuracy reached ±0.005mm, far exceeding the tolerance requirements, ensuring efficient engine operation.
Case 2: Mobile Phone Mid-Frame Machining
Tolerance Requirements: Length tolerance ±0.05mm, flatness 0.02mm.
Accuracy Guarantee: Utilizing a high-rigidity vertical machining center equipped with a high-pressure cooling system; Optimizing toolpaths through programming to reduce vibration; Employing automated inspection equipment for full inspection.
Result: Accuracy reached ±0.03mm, meeting tolerance requirements and enabling large-scale mass production.
Summary
Difference: Accuracy is the “closeness between the actual result and the target,” while tolerance is the “allowable error range.” The former reflects processing capability, while the latter sets the acceptance standard.
Relationship: Tolerance defines the boundary for accuracy; accuracy must be within the tolerance range. High-precision equipment can support smaller tolerances, but a balance must be struck between cost and functional requirements.
Core CNC Application: Through equipment selection, process optimization, and inspection feedback, accuracy is maximized within tolerance constraints, achieving a balance between quality and efficiency.

FAQ of cnc machining accuracy and tolerance
Does a smaller tolerance always mean higher machining costs? Why?
Yes. Smaller tolerances generally mean higher costs because:
They require more precise equipment (e.g., 5-axis machine tools) and inspection tools;
The process is more complex (e.g., constant temperature machining, multiple inspections);
Small errors can easily lead to scrap, increasing rework costs.
Exception: Optimizing the process (e.g., high-speed cutting) can reduce costs, but requires upfront investment.
What could be the reason for accuracy meeting the standard but tolerances not meeting it?
Possible reasons:
Inappropriate tolerance setting: Exceeding equipment capabilities (e.g., ±0.005mm tolerance in standard CNC machining);
Systematic deviation: Machine tool wear causing consistently larger or smaller machining results;
Measurement error: Uncalibrated inspection tools leading to incorrect acceptance of acceptable products.
Solution: Adjust tolerances, repair equipment, calibrate measuring tools.
How to choose the appropriate tolerance grade?
Choose based on the following factors:
Functional requirements: Use high precision (IT6~IT7) for critical parts (e.g., gears), and relax the tolerance for non-critical parts (e.g., decorative grooves) (IT11~IT12);
Cost constraints: Each reduction in tolerance grade increases cost by 20%~50%;
Industry standards: Refer to international (ISO) or domestic standards (e.g., GB/T 1804).
Example: Aerospace parts use ±0.001mm (IT5), and general parts use ±0.1mm (IT10).
What are the key technologies for improving machining accuracy?
Improve from three aspects:
Equipment: Use high-precision machine tools (e.g., closed-loop control with grating rulers) and online measurement systems;
Process: High-speed cutting reduces thermal deformation, and micro-lubrication reduces tool wear;
Environment: Constant temperature workshop (temperature fluctuation within ±1℃), vibration-damped foundation.
Case Study: After introducing a 5 axis machine tool, a factory reduced its roundness error from 0.01mm to 0.003mm.
What is the relationship between tolerance and surface roughness?
Differences:
Tolerance controls dimensional/shape errors (e.g., diameter, perpendicularity);
Roughness controls surface smoothness (e.g., tool marks, ripples).
Relationship: Finishing (e.g., grinding) can simultaneously reduce tolerance and roughness;
Sealing surfaces must simultaneously meet tolerance (e.g., flatness 0.01mm) and roughness (Ra 0.4μm), otherwise leakage may occur.
Recommendation: Clearly define process priorities and control tolerance and roughness step by step.
Features: Each answer is limited to 3-5 points, removing technical details and retaining core logic and practical suggestions, suitable for quick understanding or explanation to non-professionals.
