Are you struggling to get crisp, clean letters on your machined parts?
You might already know that text milling is the ultimate solution for durable, permanent part marking…
But how do you get it exactly right without breaking bits or tearing the material?
As an expert at Weldo Machining, I know that true material removal is the only way to ensure your serial numbers, logos, and text signs survive decades of harsh wear. Lasers and stickers simply don’t cut it when you need a deep, tactile finish.
In this guide, you’re going to learn the complete end-to-end process for flawless CNC text engraving, step by step.
I’ll reveal the exact cutting depth parameters, the best V-bit tools, and the top single line fonts that actually work on the shop floor.
So if you’re looking to eliminate fuzzy edges and achieve permanent, professional results on every single pass, this guide is for you.
Let’s dive right in.
What Text Milling Really Is and Why It Matters
When I talk about text milling, I’m not talking about lightly scratching the surface of a part. Text milling is the process of using a CNC machine and rotating cutting tools to carve precise, deep, and permanent characters directly into a workpiece. It is a critical machining operation for everything from industrial part traceability to high-end custom signage.
Text Milling vs. General Engraving
There is a distinct difference between text milling and general engraving methods. General engraving often refers to diamond drag techniques or light laser etching that barely penetrates the material. Text milling, on the other hand, actively removes stock using specialized CNC engraving bits. This allows you to control the exact cutting depth, creating a physical profile that won’t wear away over time.
Core Benefits
Why do we rely on text milling on the shop floor? It comes down to three main advantages:
| Benefit | Why It Matters |
|---|---|
| Durability | Deeply milled text survives harsh environments, friction, and heavy wear. |
| Repeatability | CNC precision guarantees the 100th part looks exactly like the first. |
| Versatility | Easily cuts through tough metals, dense plastics, and hardwoods. |
When to Choose Text Milling
You should choose text milling over other engraving methods when your project demands absolute permanence. Here is exactly when I recommend firing up the spindle for text work:
- Permanent part marking: When serial numbers, logos, or safety warnings must outlast the component they are attached to.
- Paint-filled text signs: You need a specific, uniform cutting depth to hold enamel or epoxy fills securely.
- Tactile requirements: When the lettering needs to be physically felt, such as on control panels or ADA-compliant signage.
- Reflective materials: When working with bare aluminum, copper, or brass that would scatter or reflect a standard laser beam.
Text milling gives you complete control over the final look, feel, and longevity of your lettering.
The End-to-End Text Milling Process
Getting clean, professional results with text milling requires a disciplined workflow. I’ve learned that skipping a single step in the prep phase usually leads to broken bits or unreadable characters. Here is the streamlined process I use to ensure every letter comes out crisp and permanent.
Design and Vector Preparation
Everything starts with clean geometry. I always recommend using vector-based software to create your layout. If your lines aren’t smooth in the design phase, the CNC will stutter, leaving “chatter” marks on your text.
- Font Selection: For small tags, I stick to single-line fonts (stick fonts) to save time. For logos, I use TrueType fonts but ensure the paths are closed.
- Scaling: I double-check that the stroke width of the font is wider than the tip of the CNC engraving bits I plan to use.
- File Formats: Export your work as a DXF or SVG to maintain high resolution for the CAM software.
CAM Programming and G-code Generation
This is where I turn the art into instructions. In the CAM environment, I define exactly how the tool moves.
- Toolpath Selection: I use “Engrave” toolpaths for V-bits to vary the width based on depth, or “Trace” for constant-depth single line fonts.
- Clearance Heights: I set conservative retract heights to avoid hitting clamps, especially when moving quickly between letters.
- G-code Export: I always run a simulation to check for “air cutting” or potential crashes before sending the file to the machine.
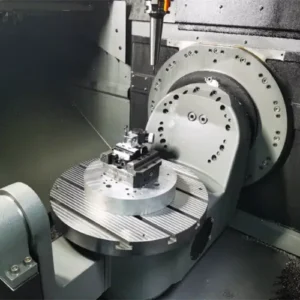
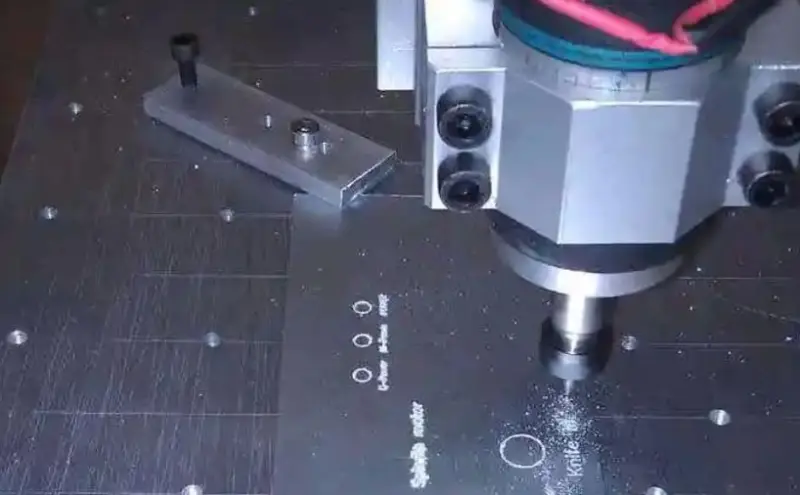
Machine Setup and Fixturing
In text milling, the biggest enemy is an uneven work surface. If your material is tilted by even a fraction of a millimeter, one side of your text will be too deep while the other disappears.
- Surface Leveling: I often mill a “spoiler board” or use a touch probe to map the surface of the part.
- Rigid Fixturing: I use low-profile clamps or vacuum tables to keep the material dead flat.
- Zeroing the Z-axis: I use a precision feeler gauge or an electronic touch plate to set the Z-zero. For fine text, accuracy here is non-negotiable.
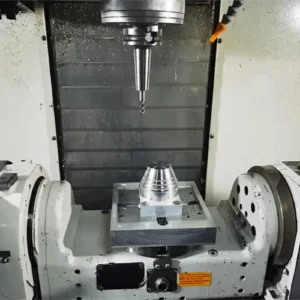
Execution and Quality Inspection
Once the spindle is up to speed, I keep a close eye on the first few characters.
- Real-time Adjustments: I stay ready to adjust the feed rate override if I hear the tool vibrating or see “fuzz” on the edges of the cut.
- Chip Clearing: I use compressed air or a vacuum to keep the paths clear. Recutting chips is the fastest way to dull a fine engraving bit.
- Final Inspection: After the cycle finishes, I inspect the cutting depth and legibility under bright light. I look for consistent “V” grooves and clean intersections where lines meet. If the material is metal, a quick pass with a deburring tool or Scotch-Brite pad usually brings out the final professional shine.
Essential Tools and Equipment for Text Milling
To get clean, crisp letters, you need the right hardware. I always find that precision in text milling starts with the machine and ends with the cutting tool. Here is the essential gear required for top-tier CNC text engraving.
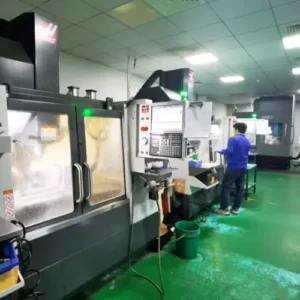
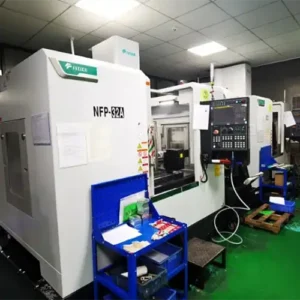
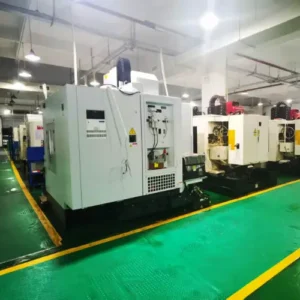
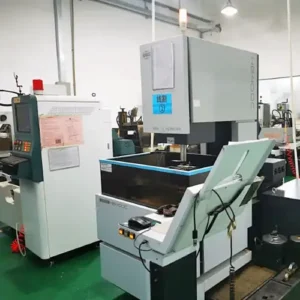
CNC Mills and Routers
The machine you choose dictates your baseline quality.
- CNC Mills: Perfect for heavy metals like steel, brass, or titanium. Their massive rigidity prevents vibration, ensuring sharp text and permanent part marking.
- CNC Routers: Ideal for wood, plastics, and aluminum. They offer larger work areas, making them the standard choice for large-scale CNC signage engraving.
CNC Engraving Bits
Selecting the right cutter is the secret to flawless V-bit text milling and fine detailing.
- V-Bits: The absolute standard for lettering. They create sharp corners and variable line widths depending on your cutting depth. Common angles are 60° and 90°.
- Ball-Nose End Mills: Best for rounded, smooth-bottomed text. These are great for 3D lettering or softer materials where you want a stylized look.
- Single-Flute Cutters: Excellent for clearing chips quickly when milling text into plastics or aluminum. They prevent the material from melting and sticking to the bit.
Tool Material: Carbide vs. HSS
When it comes to durability and edge retention, the choice is straightforward.
- Solid Carbide: My go-to for almost every text milling job. Carbide stays sharper longer, handles higher heat, and cuts cleaner edges. It is essential for precision logo milling.
- High-Speed Steel (HSS): Cheaper, but dulls quickly. I only use HSS for very soft woods or quick, low-volume prototype runs.
Spindle Speed and Rigidity
Text milling usually involves tiny tools, which means your machine setup needs to be dialed in perfectly.
- High RPMs: Small CNC engraving bits need high spindle speeds—often 15,000 to 24,000 RPM—to achieve the correct surface speed and slice cleanly through the material.
- Maximum Rigidity: Any play in the spindle or gantry causes chatter. Chatter instantly ruins the micro-details in small fonts. Always ensure your workpiece is clamped down tight and your machine is properly trammed before starting the job.
Software and CNC Fonts That Deliver Results
The success of any text milling project heavily depends on the digital foundation you build before the machine even powers on. Choosing the right software and the appropriate CNC fonts dictates how clean, legible, and efficient your final engraving will be.
CAM Software Engraving Platforms
I rely on a few proven platforms to get the job done right, depending on the specific demands of the project.
- Fusion 360: For general machining and integrated CAD/CAM workflows, Fusion 360 text milling features are robust and highly accessible. It handles text wrapping on cylinders and flat surfaces with ease.
- Vectric Aspire: If I am working on wood, plastics, or creating intricate text signs on a CNC router, Vectric is my go-to. Its dedicated V-carving toolpaths are specifically optimized for artistic and commercial signage.
- Mastercam: For heavy-duty industrial applications, permanent part marking, and precision logo milling, Mastercam provides the advanced, granular control needed for complex engraving methods CNC.
Dedicated Text Milling Tools and Plugins
Beyond the main CAM platforms, specialized plugins can save hours of programming time. Many modern CAD/CAM systems offer dedicated text generation tools that automatically handle character spacing (kerning), scaling, and alignment. If your primary software struggles with complex text wrapping along curved surfaces or generating rapid serial numbers, third-party engraving plugins can integrate directly into your workflow to generate clean, optimized toolpaths without the usual headache.
TrueType vs. Single Line Fonts CNC
Choosing the right CNC fonts is just as critical as selecting your tooling. Understanding how the machine interprets different font files will save you from ruined parts and excessive machining times.
- TrueType and OpenType Fonts: These are outline fonts. The software generates a toolpath that cuts around the inner and outer boundaries of each letter. They are perfect for V-bit text milling where you want varying line widths, bold lettering, or large text signs. The machine clears out the space between the outlines.
- Single Line Fonts (Stick Fonts): Also known as stick fonts engraving, these consist of a single path for the cutting tool to follow. Single line fonts CNC are absolutely essential for small text, part numbers, and fast cycle times. The bit simply traces the line once, making it incredibly efficient and clean.
Font Selection for Legibility
Not every font that looks good on a computer screen translates well to metal, plastic, or wood. When selecting a font, I always prioritize legibility and factor in the physical limits of the cutting depth engraving process.
- Keep it simple: Sans-serif fonts like Arial, Helvetica, or standard block lettering are the most reliable for small text and industrial marking. They do not have delicate tails or varying line weights that can get lost during the cut.
- Watch the spacing: Tight kerning causes letters to bleed together, especially during multi-pass text carving or when milling deep into a material. Always open up the character spacing slightly to ensure each letter stands alone.
- Match the tool to the font: Fine, elegant scripts require sharp engraving bits and precise depth control to look right. Conversely, bold block letters can easily handle standard end mills and aggressive feed rates.
Cutting Parameters for High-Quality Text Milling
Getting the settings right is the difference between a crisp, professional mark and a jagged mess. I’ve learned that text milling requires a delicate balance of speed and pressure. Because engraving bits are often extremely fragile at the tip, your cutting depth and chip load must be dialed in perfectly to avoid snapped tools or “fuzz” on the edges of your letters.
Cutting Depth Guidelines: Shallow vs. Deep
The depth of your cut determines both the visibility and the longevity of the text.
- Shallow Engraving (0.003″ – 0.010″): Best for serial numbers and fine detail on hard metals. It’s fast and puts minimal stress on the bit.
- Deep Milling (0.015″ – 0.030″+): Used for high-visibility signage or parts that will be painted or powder-coated. This almost always requires multi-pass strategies to prevent the tip from breaking.
Dialing in RPM, Feed Rates, and Stepover
When milling text, high RPM is your best friend. Since the effective diameter of a V-bit or small ball-nose is tiny, you need high spindle speeds to maintain proper surface footage.
- RPM: Generally, run as fast as your spindle safely allows (10,000–20,000+ RPM).
- Feed Rate: Keep it steady. If you go too slow, you’ll rub and burn the material; too fast, and you’ll snap the delicate tip.
- Stepover: For pocketed or “fat” text, use a 30-40% stepover. This ensures a flat floor without visible ridges between passes.
Chip Load and Coolant Strategy
- Chip Load: Aim for a very small chip load (0.0005″ to 0.002″ per tooth).
- Coolant/Air Blast: For aluminum, use a mist or constant air blast to clear chips. If chips recut, they will mar the finish of your text. For plastics, air is usually enough to prevent melting.
Practical Parameter Table for Common Materials
| Material | Bit Type | RPM | Feed Rate (IPM) | Max Depth per Pass |
|---|---|---|---|---|
| Aluminum | 60° Carbide V-Bit | 12,000+ | 20–40 | 0.005″ |
| Brass | 90° Carbide V-Bit | 10,000 | 15–30 | 0.003″ |
| Hardwood | 60° V-Bit | 18,000 | 60–100 | 0.015″ |
| Acrylic | Single-Flute O-Flute | 15,000 | 40–60 | 0.010″ |
| Stainless | Coated Carbide V-Bit | 8,000 | 5–10 | 0.002″ |
Multi-Pass Strategies for Clean Results
I always recommend using at least two passes for deeper text. The first pass removes the bulk of the material, and a finish pass (removing the last 0.001″ to 0.002″) cleans up any burrs. This is especially critical in gummy materials like 6061 aluminum or soft plastics where edge quality is everything.
Material Selection and Surface Preparation for Text Milling
Choosing the right material is the first step toward a professional finish. Every substrate reacts differently to the spindle, and I’ve found that understanding these nuances prevents ruined workpieces and broken bits. Whether you are working with soft alloys or dense hardwoods, the material’s physical properties dictate your text milling strategy.
How Different Materials Respond
| Material Type | Response to Text Milling | Best Practice |
|---|---|---|
| Aluminum (6061/7075) | Excellent detail, very crisp edges. | Use a mist coolant to prevent chip welding. |
| Stainless Steel | High wear on bits, prone to work hardening. | Slow feed rates and high-quality carbide bits. |
| Acrylic/Plastics | Prone to melting or cracking. | Use single-flute bits and high feed rates. |
| Hardwoods (Maple/Walnut) | Holds fine detail without splintering. | Mill with the grain when possible; use sharp V-bits. |
| Brass | Beautiful contrast, very “machinable.” | Great for high-end plaques and industrial tags. |
Grain, Hardness, and Finish Requirements
When I’m working with wood or composites, grain direction is a major factor. Milling against the grain can cause “fuzzies” or tear-out, especially on smaller fonts. For metals, hardness determines your tool life. If the material is too hard, you’ll see the tip of your engraving bit snap instantly.
Surface finish is equally critical. If the stock isn’t perfectly flat, your cutting depth will vary across the text, making some letters look bold and others disappear. I always recommend facing the material or using a touch-off probe at multiple points to ensure the text milling remains consistent across the entire surface.
Preparation Tips for Professional Results
Success in text milling happens before the spindle even starts spinning. Proper preparation ensures the edges are sharp and the part stays put.
- Rock-Solid Fixturing: For thin plates, I use high-strength double-sided tape or a vacuum table. Any vibration will lead to “chatter” marks inside the letters.
- Surface Leveling: If you are working on a rough casting, mill the surface flat first. Even a 0.005″ deviation is visible in small text.
- Deburring: Metal text often leaves a small burr. Use a scotch-brite pad or a dedicated deburring tool to clean the edges without rounding over the crisp lines of the font.
- Protective Masking: When milling plastics or painted metals, leave the protective film on or apply painter’s tape. This prevents the pressure foot or chips from scratching the finished surface during the text milling process.
Real-World Applications of Text Milling
I see text milling used across countless industries every day. It is the go-to method when you need precision, durability, and absolute permanence. Here is how different sectors put this machining process to work.
CNC Signage Engraving
Whether it is for commercial storefronts, outdoor park markers, or industrial warning plates, text signs created with CNC routers stand the test of time. We rely on text milling to carve deep, readable letters into metal, wood, and acrylic that will not peel, scratch, or fade like printed vinyl.
Permanent Part Marking and Traceability
In modern manufacturing, tracking parts is non-negotiable. Text milling provides permanent part marking for critical data, including:
- Serial numbers
- Batch and date codes
- Part identification numbers
This guarantees lifetime traceability on heavy-duty machinery, oil field equipment, and automotive components that endure harsh, abrasive environments.
Medical Devices and Prototype Branding
When I machine a new prototype, adding a crisp, milled logo instantly elevates the perceived value of the final product. For the medical sector, CNC text engraving is heavily regulated and essential. Surgical tools, trays, and implants require clean, deep marks that survive repeated high-heat autoclaving without harboring bacteria.
Aerospace and Architectural Applications
- Aerospace: Flight components demand strict compliance and traceability. Text milling delivers exact, legible engraving on titanium and aluminum parts without compromising the structural integrity of the metal.
- Architecture: Milled text is the industry standard for premium building directories, custom elevator control panels, and heavy bronze or stainless steel dedication plaques.
Text Milling vs. Laser Engraving
I often see shops struggling to choose between text milling and laser engraving. While lasers are incredibly fast and great for high-contrast surface marking, text milling remains the undisputed champion for heavy-duty, permanent applications. When evaluating different engraving methods, it comes down to what the final part needs to survive.
Here is a direct comparison of how these two processes stack up:
- Durability & Cutting Depth: Text milling physically carves into the material. If you need a specific cutting depth for parts exposed to harsh weather, friction, or sandblasting, milling is the only reliable choice. Lasers typically just burn or alter the top surface.
- Material Versatility: Lasers often struggle with highly reflective metals like bare aluminum or copper unless you invest in expensive fiber systems. A CNC mill cuts right through these materials without issue.
- Speed & Cost: Lasers win on speed for shallow marks and have zero tool wear. Milling takes more setup time and requires replacing bits, but it adds unmatched physical value and permanence to text signs and industrial components.
- Surface Finish: Lasers leave a burnt, oxidized, or melted edge. Milling leaves a clean, crisp, mechanically machined finish.
When to Choose Text Milling
You should opt for CNC text milling over lasers when the job demands absolute permanence and a premium, engineered feel.
- Deeper Marks: Milling is essential for parts that will be painted over, powder-coated, or subjected to heavy physical wear. The deep grooves ensure the text remains legible long after surface treatments are applied.
- Premium Tactile Feel: The physical channel created by a milling bit gives custom parts a high-end, three-dimensional texture. You can run your fingers over the text and feel the quality.
- No Heat-Affected Zone (HAZ): Lasers use intense, localized heat to vaporize material, which can warp thin parts, create micro-cracks, or ruin the heat treat on specific metals. Text milling removes material mechanically, keeping the structural integrity and temper of your part completely intact.
Pro Tips and Troubleshooting for Flawless Text Milling
Even with the best CNC setup, text milling requires a sharp eye for detail to get professional results. I’ve found that the difference between a “hobbyist” look and a “factory-grade” finish usually comes down to how you handle tool wear and machine calibration.
Keeping Your Tools Sharp and Your Lines Crisp
Dull CNC engraving bits are the primary cause of burrs and “fuzzy” edges. Because these bits often have extremely fine tips, they heat up and wear down faster than standard end mills.
- Monitor Tool Life: If you start seeing raised edges or “fuzz” on the strokes of your letters, swap the bit immediately.
- Clean Your Bits: Pitch and resin buildup on the flute can cause rubbing rather than cutting. A quick soak in a dedicated cleaner saves your finish.
- Check the Runout: Even a tiny amount of wobble in your spindle will snap a fine V-bit. Always ensure your collet is clean and the tool is seated perfectly.
Mechanical Tweaks and Inspection
Mechanical play is the enemy of precision. If your machine has even a thousandth of an inch of backlash, your “O”s won’t close and your “T”s will look crooked.
- Backlash Compensation: Regularly calibrate your lead screws or rack-and-pinion systems. In text milling, small errors are magnified.
- Inspection Lighting: Use high-angle LED raking lights. By shining light across the surface rather than directly down, you can spot uneven cutting depth or chatter marks that are invisible under standard shop lights.
- Post-Process Finishing: For the cleanest look, I recommend a quick pass with a Scotch-Brite pad or a fine deburring tool. If you’re working with aluminum, a light bead blast after milling makes the text pop.
Quick Fixes for Common Text Milling Issues
| Problem | Likely Cause | The Quick Fix |
|---|---|---|
| Fuzzy or Burred Letters | Dull bit or wrong feed direction | Replace bit; ensure you are climb cutting in metals. |
| Uneven Cutting Depth | Workpiece isn’t flat or bed is unlevel | Use a touch probe or “surface map” the material before cutting. |
| Broken Tips | Feed rate too high or plunge too aggressive | Slow down the entry speed (plunge rate) and reduce chip load. |
| Distorted Characters | Loose belts or backlash | Tighten drive components and check for mechanical play. |
| Melting (Plastics) | RPM too high / No coolant | Lower the spindle speed and use a single-flute bit to clear chips. |
Professional Finishing for High-Contrast Results
If you want your text milling to stand out, try “paint filling.” We often mill the text slightly deeper, spray the entire area with a contrasting paint, and then sand the top surface once dry. This leaves the paint trapped only in the milled grooves, creating a crisp, high-end look used in everything from control panels to custom signage. Always ensure your cutting depth is consistent across the entire part to keep the line weights uniform.
Frequently Asked Questions About Text Milling
I get a lot of questions about the specifics of text milling and how to get the best results on the shop floor. Here are the most common inquiries I handle regarding the process and equipment.
What materials can be text milled?
You can perform text milling on almost any rigid material. In my experience, the most common choices include:
Metals: Aluminum (6061 is a favorite), brass, copper, and stainless steel.
Plastics: Acrylic, Delrin (POM), and HDPE.
Woods: Hardwoods like maple and walnut hold detail much better than softwoods.
Composites: G10 and carbon fiber, though these require specialized CNC engraving bits.
How do I choose the right font for CNC text?
The choice depends on your goal. For high-speed production and permanent part marking, I always recommend single line fonts (stick fonts). They allow the tool to follow a single path, drastically reducing cycle time. If you need aesthetic CNC signage engraving, TrueType or OpenType fonts work well, but they require pocketing or V-carving strategies in your CAM software engraving setup.
What’s the best cutting depth for permanent marks?
For most industrial applications, a cutting depth for engraving between 0.005″ and 0.020″ is the sweet spot.
Shallow (0.003″ – 0.005″): Best for polished surfaces where you want a subtle look.
Standard (0.010″ – 0.015″): Ideal for parts that will be painted or powder-coated.
Deep (0.020″+): Used for heavy-duty branding or when the text needs to remain legible after significant wear.
Can small shops do text milling in-house?
Absolutely. You don’t need a million-dollar horizontal mill to achieve professional results. Most modern CNC routers and entry-level mills can handle precision logo milling with the right V-bit text milling cutters and a stable setup. If your machine can run G-code text signs, you can do this in-house.
How does text milling compare to laser engraving?
While laser engraving is faster for surface marking, text milling offers distinct advantages:
Depth and Texture: Milling creates a physical groove you can feel, which is often required for specific military or aerospace standards.
No Heat-Affected Zone: Unlike lasers, milling doesn’t alter the material’s temper or create charred edges on plastics.
Durability: Milled text is nearly impossible to wear off, making it the superior choice for permanent part marking in harsh environments.