Anodizing cannot hide surface problems on a part. On the contrary, it often makes machining marks, scratches, oil contamination, fingerprints, material structure differences, uneven bead blasting, burrs, and local corrosion more visible. Many defects, such as color variation, black spots, white marks, pitting, burning, or poor sealing, are not caused by the anodizing process alone. They are usually the result of material conditions, chemical solutions, electrical parameters, and production operations working together.
Therefore, to consistently obtain high-quality anodized aluminum parts, quality control should not wait until final inspection. It should start before the electrolytic anodizing stage.
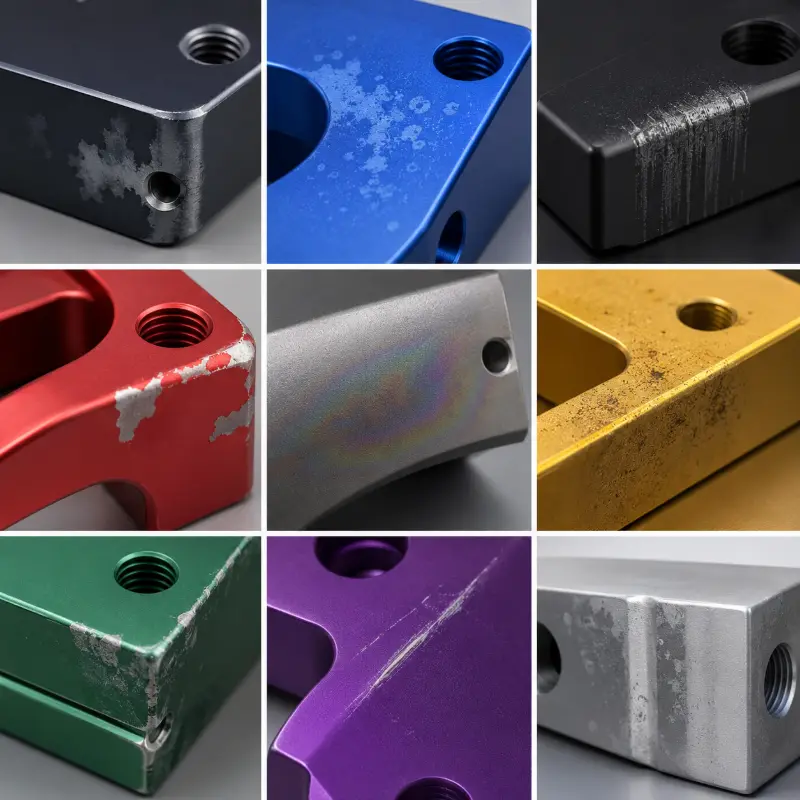
Common Anodizing Defects and Their Appearance
Over the past 15 years, Weldo Machining has manufactured a large number of anodized aluminum parts for customers in electronics, automation equipment, robotics, medical devices, and industrial machinery. Through customer feedback, rework cases, and mass production quality issues, we have summarized the surface finishing problems most often seen in our quality inspection department, as shown below.
| Defect Type | Common Appearance | Initial Diagnosis |
|---|---|---|
| Color variation | Parts from the same batch show different shades; black anodizing appears gray or yellow; colors vary between batches | Material batch, coating thickness, bead blasting, dyeing, or sealing consistency issues |
| Black spots / white marks | Black dots, white marks, water stains, local patches, or whitening near holes and edges | Oil residue, insufficient cleaning, trapped liquid in holes, material inclusions, poor sealing |
| Rough lines / machining marks | Tool marks, chatter marks, lengthwise lines, or uneven local texture remain visible after anodizing | Machined surface quality, fixture marks, acid corrosion, or uneven bead blasting |
| Pitting / small pits | Small depressions or dotted defects on the surface, threaded areas, or near hole openings | Machining defects, burrs, local corrosion, excessive acid pickling or alkaline etching |
| Burning / gray surface | Edges or local areas turn gray, black, rough, or powdery | Current concentration, sharp edges, poor rack contact, abnormal bath temperature |
| Color fading / poor corrosion resistance | Color rubs off, becomes lighter, surface stains easily, or salt spray test fails | Unstable dyeing, insufficient sealing, unsuitable sealing method |
| Rack marks / handling scratches | Contact marks, clamp marks, scratches, dents, or packaging pressure marks on cosmetic surfaces | Improper rack location, poor fixturing, insufficient handling or packaging protection |
4 Main Causes of Anodizing Defects and How to Prevent
Material-Related Problems
Material is the foundation of anodizing quality. Even when the anodizing process is exactly the same, different aluminum grades, material batches, grain structures, and base metal microstructures can lead to different anodizing results.
Effect of Aluminum Alloy Grade
Different aluminum alloys contain different amounts of magnesium, silicon, copper, zinc, iron, and other elements. These elements directly affect the color, brightness, uniformity, and corrosion resistance after anodizing.
| Aluminum Alloy | Anodizing Performance | Recommendation |
| 6061 | Good overall performance | Suitable for most anodized machined aluminum parts |
| 6063 | Good cosmetic appearance | Suitable for decorative and cosmetic parts |
| 6082 | Relatively stable anodizing performance | Suitable for structural and mechanical parts |
| 7075 | High strength, but color tends to be darker | Suitable for functional parts; higher risk of cosmetic color variation |
| 2024 | High copper content, higher cosmetic and corrosion risk | Not recommended for high-cosmetic anodized parts |
| ADC12 / A380 | High silicon content, prone to gray, black, or mottled appearance | Not suitable for high-quality cosmetic anodizing |
Material Batch and Microstructure Differences
Even with the same 6061 grade, different suppliers, batches, or heat treatment conditions may cause visible color variation after anodizing. For multiple cosmetic parts used in the same product, mixing material batches can easily lead to gray, black, or yellowish color differences.
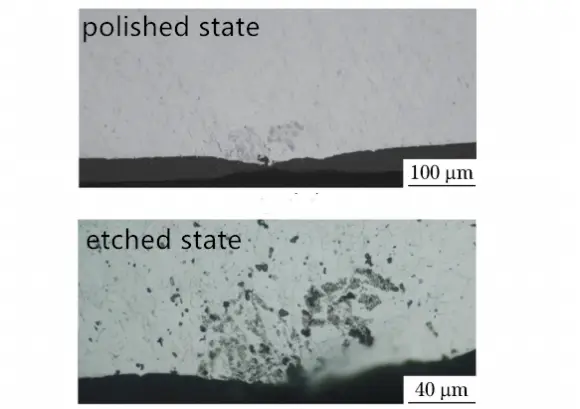
Material microstructure also affects anodizing results. Surface inclusions, abnormal dispersoid distribution, or grain differences may cause black spots, streaks, color variation, mottling, or two-tone appearance.
Because the root cause comes from the material itself, these defects usually cannot be completely solved by adjusting dyeing or sealing parameters.
Machining Defects
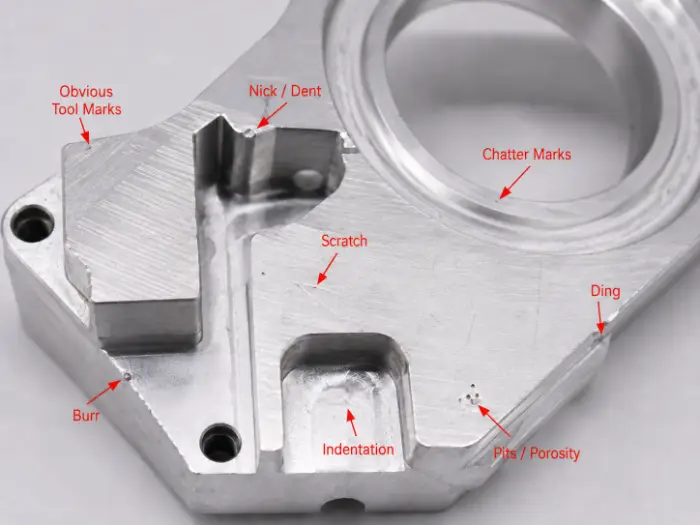
Many anodizing defects originate during machining. For example, tool marks, burrs, thread defects, fixture dents, and local corrosion formed during CNC milling may become more obvious after anodizing.
Typical examples include:
- Raised machining lines may undergo local corrosion during acid pickling or chemical polishing, forming rough lines after anodizing.
- Thread defects or burrs may corrode and appear as pitting after anodizing.
- Fixture dents may become visible color differences or dark marks after anodizing.
- Deep tool marks may remain visible even after bead blasting.
- Burrs around holes, slot bottoms, and sharp edges may cause blackened edges, pitting, or local coating abnormalities after anodizing.
Anodizing is not a process for hiding machining defects. Cosmetic surfaces must be stable, clean, and free from obvious defects before anodizing.
Solutions
- For high-cosmetic parts, prioritize 6061 or 6063 and avoid die-cast aluminum materials such as ADC12 and A380.
- Use the same material batch for cosmetic parts in the same product whenever possible to reduce color variation after anodizing.
- For higher-risk materials such as 7075 and 2024, perform trial anodizing before mass production to verify color and appearance.
- If obvious tool marks, scratches, burrs, or sharp edges are found after machining, repair them by grinding, chamfering, reworking, or remachining before sending the parts for anodizing.
- If coarse grains, surface inclusions, abnormal microstructure, or other material defects are found, consider changing the material first and, if necessary, add surface microstructure inspection instead of repeatedly adjusting anodizing parameters.
Chemical Solution Problems
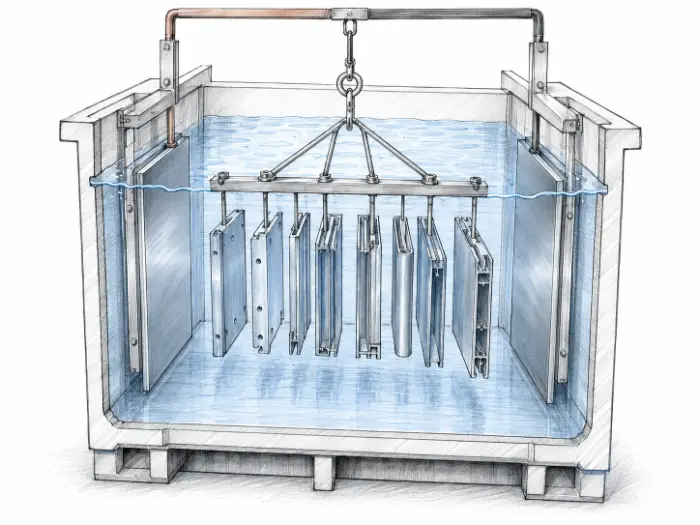
Anodizing does not involve only one anodizing tank. A complete process usually includes degreasing, alkaline etching, desmutting, anodizing, dyeing, sealing, and multiple rinsing steps. Any abnormal condition in these solutions may cause final defects.
Insufficient Degreasing and Cleaning
If cutting fluid, oil, rust preventive, fingerprints, or polishing compound on machined aluminum parts is not fully removed, it can interfere with oxide film formation. This may cause black spots, white marks, uneven dyeing, local uncoated areas, or water stains after sealing. Complex areas such as holes, slots, threads, and internal cavities are more likely to retain contaminants and processing solutions, making them more prone to white marks, corrosion, or color abnormalities.
Abnormal Alkaline Etching, Acid Pickling, or Desmutting
Alkaline etching is often used to remove the natural oxide layer, light contamination, and local surface irregularities. Sodium hydroxide solution is a common medium. However, if alkaline etching, acid pickling, or chemical polishing parameters are not well controlled, they may over-attack the aluminum substrate. For example, excessive alkaline etching can increase surface roughness, while excessive acid pickling may cause local corrosion.
In addition, after alkaline etching, the aluminum surface may retain dark gray residues formed by silicon, copper, iron, zinc, or other alloying elements. If desmutting is insufficient, these residues can interfere with uniform oxide film growth and cause black spots, gray patches, mottling, or uneven dyeing.
Abnormal Anodizing Electrolyte, Dyeing Solution, and Sealing Solution
Type II anodizing usually uses a sulfuric acid electrolyte, with a typical coating thickness of about 5–25 μm. Type III hard anodizing requires lower temperature, higher current density, and stricter process control, with a typical coating thickness of about 25–75 μm.
If electrolyte concentration, temperature, impurity level, or bath condition is abnormal, it may cause unstable coating thickness, gray surface, burning, loose coating, unstable color, or reduced corrosion resistance.
Dyeing and sealing solutions also affect final quality. Unstable dyeing parameters can cause color variation. Insufficient sealing may lead to color fading, staining, water marks, or reduced corrosion resistance.
Common sealing methods include:
| Sealing Method | Common Medium | Application |
| Hot water sealing | Boiling or near-boiling deionized water | Clear anodizing and general corrosion protection |
| Nickel acetate sealing | Nickel acetate solution | Black and colored dyed anodizing |
| Cold sealing | Nickel fluoride-based system | High-volume decorative anodizing |
| Dichromate sealing | Dichromate solution | Special corrosion-resistant, aerospace, or military applications |
Type II dyed anodizing usually requires sealing to improve color stability and corrosion resistance. Whether Type III hard anodizing should be sealed depends on the application. The decision should balance wear resistance and corrosion resistance.
Solutions
- The degreasing solution should effectively remove cutting fluid, oil, fingerprints, and polishing compounds.
- Alkaline etching and acid pickling time should not be too long to avoid excessive surface corrosion.
- Desmutting should be sufficient, especially for 7075, 2024, and silicon-containing materials.
- Sulfuric acid anodizing baths should control concentration, temperature, and impurity levels.
- The sealing solution should control pH, temperature, time, and water quality to ensure color stability and corrosion resistance.
Electrical Parameter Problems
Anodizing is an electrochemical process. Current, voltage, time, temperature, electrical contact, and current distribution all affect coating quality.
Improper Current Density and Temperature Control
Excessive current density can cause overly fast reactions at sharp corners, thin walls, and areas with poor electrical contact, resulting in burning, gray surfaces, roughness, or powdery coating. For hard anodizing, bath temperature control is especially important. Excessive temperature can disturb the balance between oxide film growth and dissolution.
Improper Anodizing Time and Coating Thickness Control
Anodizing thickness depends on time, current density, alloy, and bath condition. If the time is too short, the coating may be too thin, reducing corrosion resistance and dye absorption. If the time is too long, the coating may become too thick, causing dimensional deviation, increased roughness, or darker color.
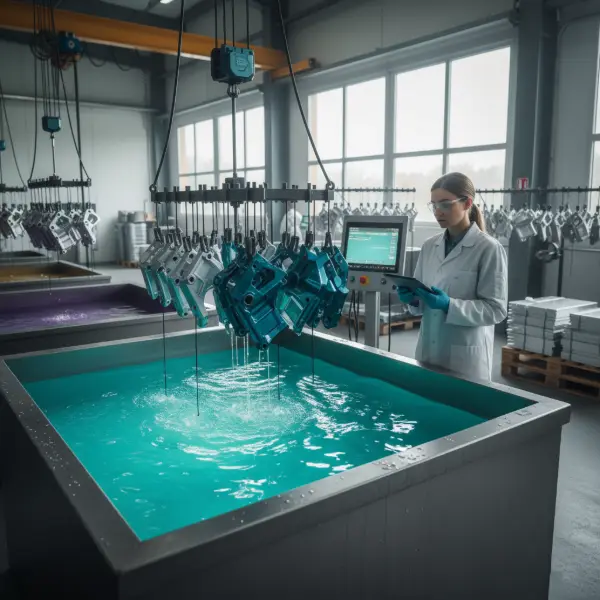
Type II anodizing typically has a coating thickness of about 5–25 μm and is suitable for appearance, corrosion protection, and dyeing. Type III hard anodizing typically has a coating thickness of about 25–75 μm and is suitable for wear resistance, insulation, and functional reinforcement.
Poor Electrical Contact
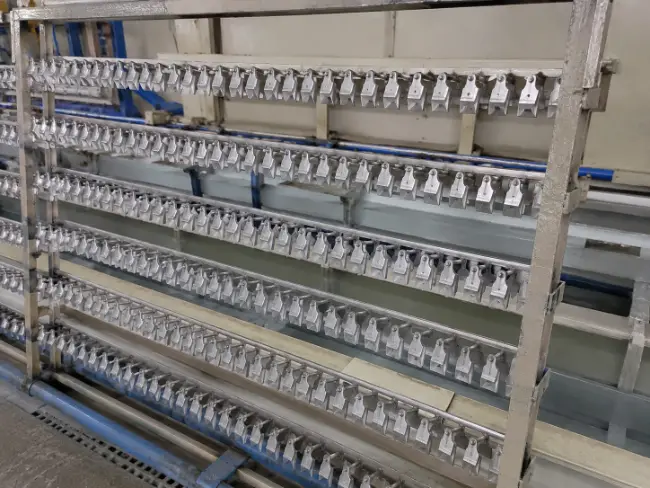
Racks are not only used to hold parts; they also provide electrical conduction. If rack contact area is too small, contact points are loose, or an existing oxide layer affects conductivity, parts may show local uncoated areas, uneven thickness, color abnormalities, local burning, or blackening near rack points.
Solutions
- Calculate proper current based on part surface area, and control current density and bath temperature to avoid burning and coating abnormalities on edges and thin walls.
- Optimize racking and electrical contact to ensure stable conductivity, improve current distribution, and reduce uneven thickness or local color differences.
- Control anodizing time according to thickness requirements, confirm whether required thickness can be achieved in deep holes, narrow slots, and internal cavities, and consider dimensional compensation in advance.
Operational Errors
In addition to material, chemical solutions, and electrical parameters, manual operations and process control can also cause anodizing defects, especially on cosmetic parts and black anodized parts.
Inconsistent Surface Pretreatment
Bead blasting, brushing, and polishing directly affect color and appearance consistency after anodizing. Inconsistent bead blasting parameters may cause differences in gloss and color. Brushed parts should maintain the same grain direction. Polished parts must be thoroughly cleaned to remove polishing compound and wax; otherwise, uneven dyeing, spots, or coating abnormalities may occur.
Insufficient Rinsing and Drying
Rinsing and drying after anodizing directly affect final appearance and corrosion resistance. If processing liquid remains in holes, slots, threads, or internal cavities, it may cause white marks, water stains, corrosion, uneven dyeing, or poor sealing. Deep holes, blind holes, and complex structures should receive extra rinsing, blowing, and drying control.
Improper Masking and Rack Planning
Certain areas of machined aluminum parts, such as threads, bearing bores, grounding surfaces, press-fit surfaces, and sealing surfaces, often need masking according to functional requirements. Poor masking planning may cause dimensional changes, assembly problems, reduced electrical conductivity, or rack marks on cosmetic surfaces.
Poor Handling and Packaging
Many anodized parts are acceptable when the process is completed, but they are scratched or contaminated during inspection, transfer, packaging, or shipping. This is especially obvious on black anodized parts, where light scratches, dents, or part-to-part friction can expose bright aluminum underneath.
Solutions
- Confirm rack mark locations before anodizing.
- Mask threads, bearing bores, sealing surfaces, grounding surfaces, and press-fit surfaces as required.
- Rinsing and drying should cover holes, slots, and internal cavities.
- Black anodized parts should not rub directly against each other.
- Cosmetic parts should use individual packaging, soft separators, or blister trays.
Requirements to Define on Drawings and Purchase Orders
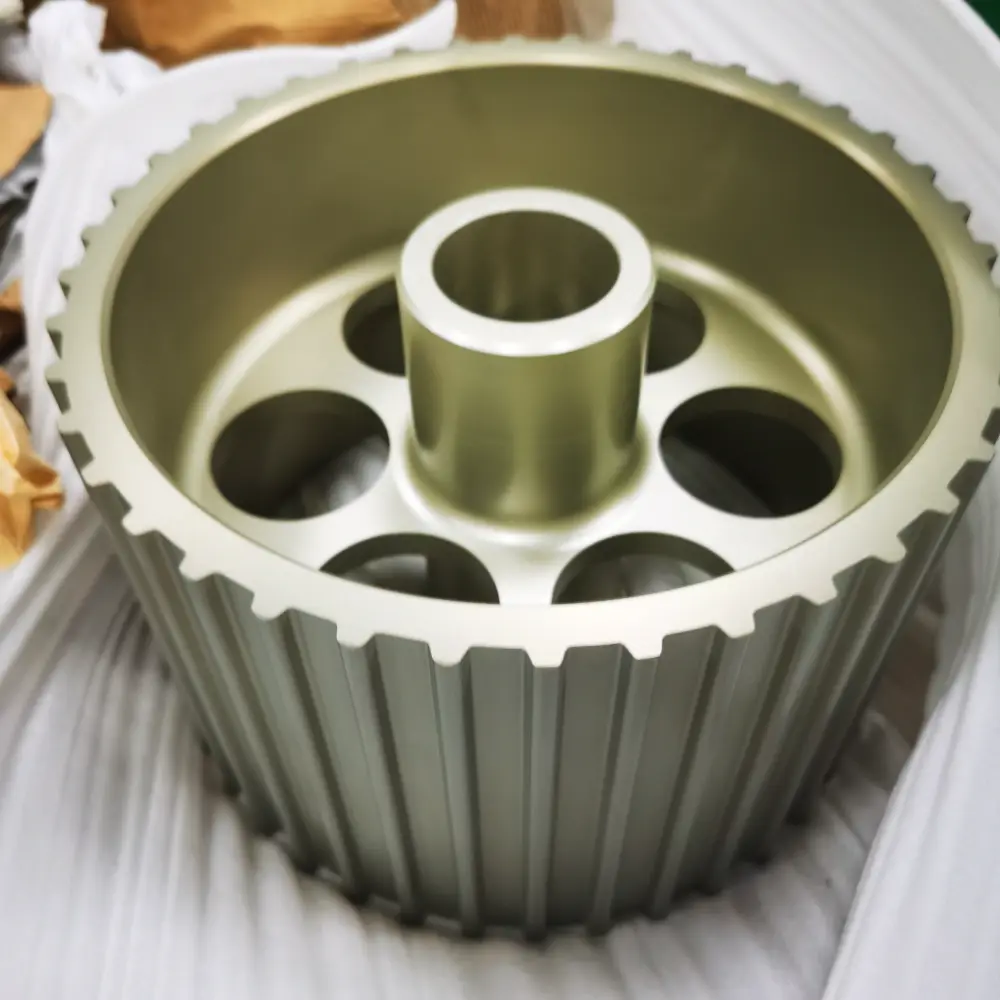
For machined aluminum parts, writing only “anodized” or “black anodized” on a drawing or purchase order is usually not clear enough. To avoid color variation, inconsistent coating thickness, dimensional issues, color fading, or assembly problems, at least the following six requirements should be defined.
Anodizing type: Clearly define the anodizing type, such as Type II, Type III, clear anodizing, black anodizing, or bronze anodizing, because different processes correspond to different appearance, corrosion protection, wear resistance, and functional requirements.
Coating thickness: Coating thickness affects corrosion resistance, wear resistance, color, and dimensions. The drawing should specify the thickness range. For hard anodizing, dimensional tolerance and assembly clearance should be considered at the same time.
Material grade: Clearly specify the aluminum alloy grade and use the same material batch whenever possible. This helps improve color consistency after anodizing and reduces color variation.
Appearance standard: Clearly define color and cosmetic requirements. An approved sample is recommended as the acceptance standard.
Sealing requirement: Clearly define whether sealing is required and which sealing method should be used, because sealing quality directly affects color stability, stain resistance, and corrosion resistance.
Masking and dimensional requirements: Clearly define areas that need masking and final dimensional requirements to prevent the anodized layer from affecting assembly accuracy or electrical conductivity.
Simplified Specification Example
Material: Aluminum 6061-T6
Process: Black Type II sulfuric acid anodizing
Coating thickness: 10–15 μm
Color: Match approved sample
Sealing: Nickel acetate sealing required
Masking: Threads and bearing bores must be masked
Conclusion
Anodizing defects are rarely caused by a single factor. They are usually the combined result of material condition, process parameters, chemical treatment, and production operations. Only by controlling the entire process, from machining preparation to post-anodizing handling, can stable appearance and functional performance be achieved.
To reduce these defects, it is better to work with an experienced one-stop machining factory like Weldo Machining. This helps ensure more stable custom parts and surface quality. If you would like to learn more or compare quotations, feel free to contact us.